[ig_ads]
So you’re finally fed up with your long beard and thinking of getting back to the basics. That’s a good decision. However, that sizable bush grown on your face is pretty good at defending itself and a simple razor isn’t going to cut it. Moreover, shaving with a manual razor takes a lot of time and makes a mess. So you can use an electric razor this time, since it’s got the power you need. But if you’re not careful, it will leave you with itchy skin and also with uneven and ingrown hairs. None of these things are expected and we’re going to make sure you will get the closest shave that you have not experienced for some time!
Time to Get Ready: 5 Steps
There is a reason to have some steps here. The reason is simple, it is basically like a warmup session for your skin just like when you warmup before exercising.
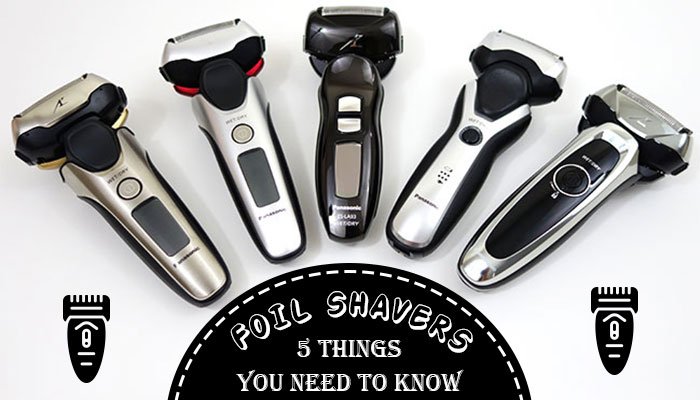
Step 1: Find a Razor that Works for You
 You must pick a razor that suits all your needs. This is actually more important than it sounds. Depending on how you prefer to shave, wet or dry, you must have an electric razor that focuses on that particular use. You must also visit a barber or other form of specialist in skin and hair to learn more about your skin type and sensitivities. That information is going to be very important for your subsequent skincare because how you shave your face will impact the quality of your skin afterwards. It will also make the grooming process easier and more comfortable.
Step 2: Wash and Prepare Your Face
 Everyone knows it but it still needs to be mentioned. Wash your face with warm water either applied to a cloth and rubbed across your face or after a hot shower. Thus, your face will be ready to be shaved. Along with removing the dirt, you may want to use additional softening cleansers so your beard can be shaved neatly.
Step 3: Find and Go Against the Grain
 Your facial hair doesn’t grow in the same direction in every part of your face. So it’s important to know how to shave properly. This can be easily figured out simply by running your fingers across your facial hair. If its smooth and easy, that’s WITH the grain. However, the opposite direction is AGAINST the grain. While shaving with an electric razor, go AGAINST the grain because it will help you have the closest shave.
[ig_ads]
Step 4: Pre-Shave Preparation
 Since you’ve got your shaver, your face is clean and you know the grain of your hair, you’re almost ready to start shaving. That last thing you need to do is prepare your hair. This can be done with a pre-shave. Most products for this purpose include Vitamin E, which protects your skin by infusing nutrients back into it and also reduces irritation from shaving. Depending on the type of shaver you use, different oils and balms can enhance your shaving experience. Another practical upswing of a pre-shave balm is that it lifts up your hair, keeping it away from your skin to ensure the closest and cleanest shave.
Step 5: Time to Adjust
 This new combination of oils and razors is going to take some time for your skin to get used to it, but stick with it. It’s also important to keep a shaving schedule to help your facial skin adjust. As long as you continue to use pre-shave balms, your face will get used to the repeated actions. It usually takes around two weeks for this adjustment process.
Dry or Wet Shave?
As mentioned before, you’ve got two options for buying your electric razor which depend on the type of razor and your preference. We are going to start by looking at dry shaving which doesn’t require the use of any balm or creams.
[ig_ads]
Dry Shaving: 5 Steps
Step 1: Facial Hair Length
 You will surely not shave until your beard or facial hair is very long and uneven. This will cause a lot of pulling and potential tearing of the hair and thus you’ll experience a lot of irritation. For this reason, you will need to trim a bit first.
Step 2: A Quick Trim
 To offset the potential of hair pulling and skin irritation, you must trim your stubble or beard before starting shaving. Get a pair of scissors and quickly bring your beard in line with the rest of the hair you are planning to cut. This will ensure that your shave will be even and tidy and finish with little to no irritation.
Step 3: How to Hold Your Shaver?
 While you shaving, hold your razor in your dominant hand. Thus, you will maintain even pressure and have total control over your shaver at all times. This will also allow you to keep your other hand free in order to pull your skin when you’re shaving a certain area. It’s important to keep your blade at a 90 degree angle, as this makes it easier to maintain even pressure and control.
Step 4: Use Proper Technique for Your Razor
 Depending on the type of shaving razor, there are different ways to use your shaver. For instance, if you’re using a rotary shaver, you need to use small, circular motions. But you shouldn’t press too hardly and glide over the same area continuously so as to avoid skin irritation. If you’re using a foil shaver, you must follow a back and forth motion while shaving.
[ig_ads]
Step 5: Proper Maintenance
 Continuous use of your shaver will clog it up with hair sooner or later. So cleaning it regularly is crucial to have a clean and healthy shave every time. Different shavers available have different ways to maintain and clean them. In fact, most foil shavers can be cleaned simply by lifting the head frame up and then carefully brushing any whiskers in there. Only use the tools supplied with your razor and don’t touch the screen because it’s quite fragile.
If you’re using a rotary shaver, lift up the head the same way you would do with a foil shaver. Then you must clean off the individual cutter as well as the razor bed. You must also not bang or tap the head against anything as it could dent. These shavers need to be properly taken care of as they are precision instruments. It is also good to occasionally soak the cutters in liquid cleaners to make sure they stay sharp and functional.
Wet Shaving: 6 Steps
Step 1: Clean and Prepare Your Face
 Using the same techniques as described above, make sure your face is properly cleaned and ready. Use warm water to wash your face and open up the pores. You can use either a warm cloth to clean your face or just a hot shower to make your face ready to be shaved.
Step 2: Balm or Gel
 Next, you need to use a gel or foam and massage it on your skin and hair. This will protect your facial skin during the shaving process and raise the facial hair to have a close shave. This will also protect you from skin irritation and ingrown hair. You need to let that set for 2 minutes in order to gain all the benefits of the vitamins as well as the moisturizing properties of the product.
Step 3: Hold Your Shaver in Your Dominant Hand
 It is always important to hold your shave in your dominant hand so that you can maintain a steady pressure during your shave, and even strokes. You’ll also get a closer shave as well as less skin irritation and ingrown hairs. Furthermore, this will leave your other hand free to stretch and hold skin tightly.
Step 4: Handle Your Sensitive Areas First
 Since electric shavers generate heat during prolonged use, it’s best to start on the more sensitive zones, like your neck. This will insure you won’t be applying too much heat to those areas and thus will ease the irritation in those areas.
Step 5: Against the Grain
 Unlike most of the times, you should go against the grain while you are wet shaving. You’ve got the protection of the lotion and gel, so you can use this technique to get a close shave. It is still a good idea to not continuously glide over the same areas or apply too much pressure on the sensitive areas for limiting skin irritation. If ignored, this can potentially cut hair below the skin level which can lead to ingrown hairs. So even pressure should be applied at all times.
Step 6: Maintenance Takes Care of Your Shaver and Your Face
 To get the closest shave every time, it is important for you to regularly clean and maintain the razor. Remember to be careful with the blades and inner working of your razor. as it is a fragile equipment. Also, always use the cleaning tools supplied with the razor to ensure you aren’t damaging the product.
[ig_ads]
Important Reminders
 Keep Your Blade Sharp
It will be a good idea to sharpen your razor’s blades or replace them every once in a while. Depending on the type of your razor, this could be a simple procedure. Just take a look at the manual to know how to perform this important maintenance task. A sharp blade will ensure an even shave as well as a proper cut. You should perform this type of maintenance once every couple of months or when you notice the blades are getting dull during your regular cleaning.
Maintain a Full Charge
It’s always a good idea to keep your razor fully charged, as a low powered razor will not be reliable to be used. Shaving razors tend to work a little harder when dealing with balms and creams, and this is especially true with wet shavers. It won’t have a steady speed while performing its job and thus the quality of your shave will suffer greatly. Uneven patches, pulled hair instead of cut hair, etc. will be the result of it. If you have a USB razor, you can recharge your razor using your laptops usb port. (Check these extra resources for more info).
Get Your Sensitive Areas First
 Always shave the tender areas first, such as your neck, sideburns and around lips. This will save your skin from irritation which happens due to the razor getting warm after a long use.
Follow the Right Motions
You must follow the grain of your hair which is normally straightforward and works from the top down to the jaw. Always hold your skin tight to get the closest and cleanest shave. You can actually go against the grain of your hair at this point. But you need to understand that while it will provide a much closer shave, it will also be more likely that you’ll cut hair underneath the skin, thus causing ingrown hairs.
Clean up Your Sideburns
Always make sure you’re looking levelly into a mirror and your depth perception is correct. You should measure your sideburns to ensure they are of even length on both sides. You can do this using your index fingers as a guide.
Lip and Chin
 Sucking in and lightly biting your bottom lip will make it convenient to reach these areas with your razor. You must go slow at this moment so that you don’t accidentally cut your lip. You can also move your jaw in the opposite direction of the side you’re actively shaving. This will keep your skin tight and help remove facial hair in a neat and even fashion.
Tidy up the Mustache Area Under Your Nose
This is a more compact area to reach with razors. The technique here is simple- start by pulling up your nose with your free hand while forcing your upper lip down and away from the side you are shaving. This will smooth out your skin and allow you to have the closest shave.
Check out if you’ve missed any spot
Since you’ve now finished shaving all your facial area, it is time to take a look at your work. Check all of your face pulling skin tight to make sure you haven’t missed any spots. If you find that you have, just repeat the steps mentioned above until you are satisfied.
Neck and Jawline
 You must get as close to the mirror as you can at this point because you’ll need to be able to see better once you crane your neck. This is a more sensitive area to shave and can prove to be tricky. Many choose to start shaving from here because of this reason. You have to tilt your head upwards to naturally tighten the skin and give you the closest shave. It will also make it a bit difficult to see this area in the mirror, which is why being closer is better.
Things to Watch For
Ingrown Hair
This can be a by-product of a poor or rushed shave, or even due to clogged pores and other skin issues. By following the steps mentioned above, you will be able to limit the amount of ingrown hair you encounter. However, if the issue still persists, you should consult a skin care professional to know about other products you could try in order to reduce the occurrence of ingrown hair.
Sensitive Skin
 Some people have very sensitive skin and the shaving process can be quite irritating for them no matter how careful they are while shaving. There are plenty of options out there for sensitive skin, such as special shaving balms or gels. It may even be ideal for one to get some additional products in order to use on their skin daily, no matter whether they are shaving or not. It’s best to consult a barber or other skincare professional about your skin type, as they can direct you to the best products for your needs.
Adjusting to Your New Shaver
It will take some time for both you and your skin to get used to an electric razor. However, following this step-to-step guide, it will get easier and more comfortable. Make sure you are shaving following the grain of your hair to decrease the irritation. It can take up to two weeks for you and your skin to adjust, so don’t give up immediately!
Aftershave Care
 Put Lotion on Your Skin
The shaving process can be harsh for your skin no matter how careful you are. So it is a good idea to get an aftershave balm or gel to protect and re-hydrate your skin after shaving. There are a lot of products available for you to choose from. So you should talk to your local barber or skin specialist in order to find something that will work for you!
Exfoliate
If you’re not using the wet shaving method, you need to make sure to exfoliate regularly. Doing this twice a week with a simple face scrub will help clear away any dead skin cells and keep your skin healthy, clean and bright!
Take Care of Your Tools
Aside of taking proper care of yourself, you need to take care of your shaver as well so that it keeps giving you the best shaving experience every single time. Follow the user manual that came with your razor to ensure you won’t damage anything while using it. Moreover, always use the tools that came with the razor to make sure you won’t jam or break internal components. You will be required to get new screens and blades every single time, so you should use only those designed for your particular shaver to avoid injury or damage.
You’re Ready to Go!
 It may look like there is a lot of work ahead of you just for a simple shave, but it’s not really that difficult. With a little patience and continued effort, you can master the art of electric razor shaving. It’s sure to save you some time in the morning. We’ve all seen that guy shaving while he takes his morning commute, you don’t want to be that guy! Keep your shaving task at home and enjoy a great shave every time by following these steps!
Special Mention:
At last the laser guided beard trimmer is here:
Grab one before it becomes unavailable.
[ig_ads]